Along with being cheap and simple, earthbag construction produces a structure that is also tough, flexible and provides good thermal mass – enough reasons for us to give it a go!
Earthbag construction (or ‘super adobe’) is a technique credited to Nader Khalili, an Iranian-born architect and humanitarian.
The technique uses polypropylene bag (the kind of bag your chook food comes in, before it is cut into lengths) as a continuous, flexible form to hold courses of earth, building up a structure layer by layer.
Rendering weatherproofs the structure and is the final binding mechanism holding the bags together.
Earthbag construction: Tools
- 4 x post hole shovels
- 2 x heavy duty steel tampers
- 1 x fencing pliers (or others strong enough to cut through barbed wire)
- 250mm plastic flowerpot, with the bottom cut off
- 1 x robust garden wheelbarrow
- 4 x cementing trowels
- 6 x 9L buckets.
Earthbag construction: Materials (what we used for our 4.2 diameter x 900mm high tank stand)
- 150m 300mm wide polypropylene bag material (purchased from the Bundaberg Bag Company)
- 300m barbed wire
- 1 cubic metre gravel
- 4 cubic metres earth (an ideal mix is about 30 % clay and 70 % sand)
- 3 bags cement
- 3 bags builders’ lime
- 1⁄2 cubic metre coarse builders’ sand
- Water
Take note: This is a job for at least two people.
Earthbag construction: Method
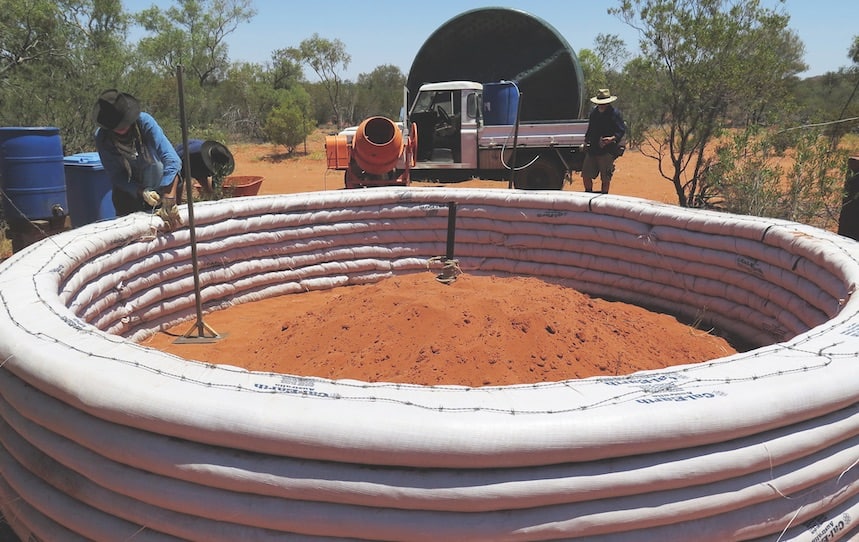
1. Marking out and footings
Mark out where your earthbag wall is going to go. Dig out below ground level for your footings. For our earthbag tank stand we used a layer of earthbag filled with gravel below ground level as footings. The approach will vary depending on your project.
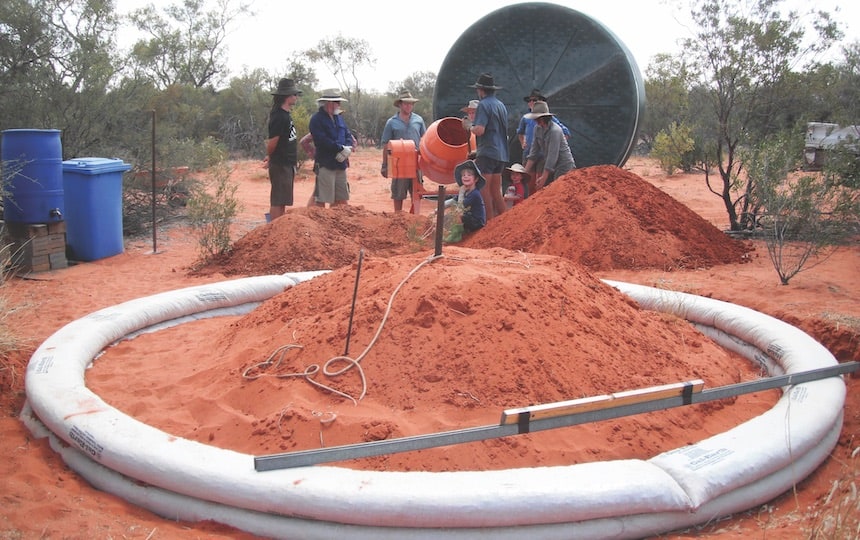
2. Mixing the earth
You need to make sure your earth mix is fully combined, so mix it well with a shovel. Damp down the mix to help the soil particles bind together inside the bag. You want it to be damp but not dripping.
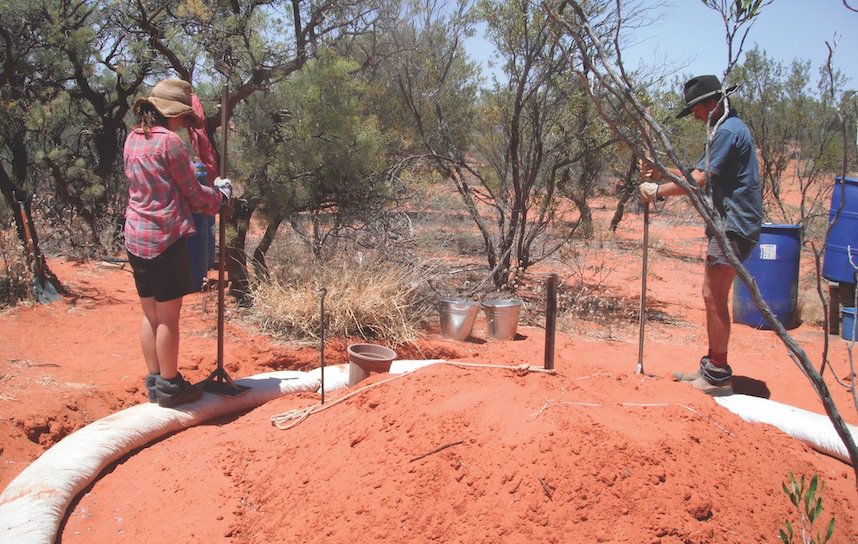
3. Filling the bag
Cut a length of bag: long enough to avoid too many joins; and short enough to handle. For our 4.5 metre diameter tank stand we did half a course at a time (6–7 metres).
Thread one end of the bag through the flowerpot and fold it over the outside edge of the pot. Then scrunch the length of bag up onto the pot as tightly as you can. You should have a tail of bag left which is about 2m long: from the chest of the person holding the pot to just past the end of their foot. Fold the other end over itself a few times and lay it on the ground.
A second person then buckets the earth mix (or gravel, for footings) into the tube of bag. The person holding the pot jiggles the dirt down the tube to the end of the bag; as the bag fills, the potholder jiggles to ensure an even fill.
If you’re working in a circle, when you reach where you started fold the ends of the bag under and wedge the end of the bagging tightly against where you started. If you’re working in a line, neatly fold the open end of bag under the filled bag when you reach the end.
4. Tamping and binding
Once your first course is laid, tamp down the bags. Listen to how the sound of the tamping changes: when it becomes
a dull thud it’s well packed enough.
Once you’ve tamped, run two lines of barbed wire about a quarter of the way in from the inside and outside edge of the bag, hooking the barbs into the bag.
Repeat steps 3 and 4 until your structure has reached its full height.
5. Chinking
We used a cob mixture to fill in the grooves between the bags for a smooth finish. This is optional.
6. Rendering
Before rendering, thoroughly damp down your earthbag wall. Then mix up your render and apply it to the wall using a trowel or mortar sprayer. We used a cement render strengthened with chook wire for our tank stand, as we needed it to be tough and rainproof.
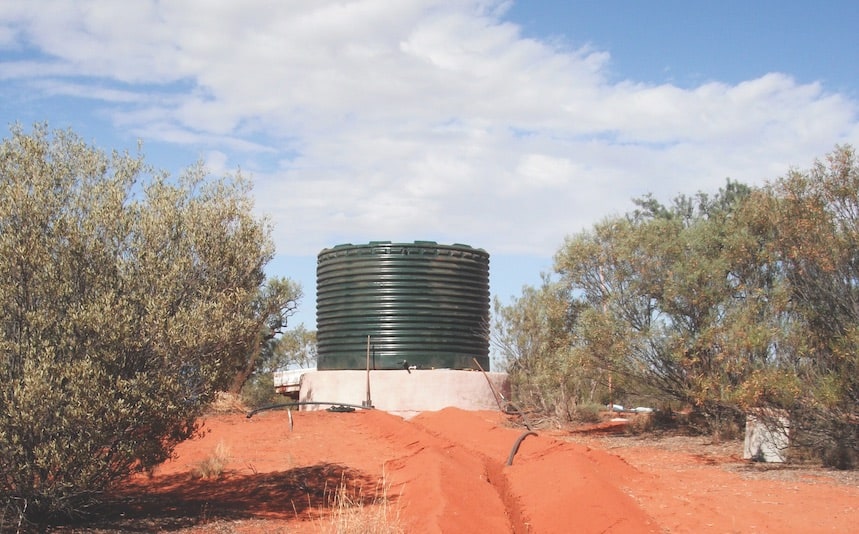
7. Finishing touches
We filled the middle of our tank stand with sand. Once this was tamped we rolled the tank up onto the stand using the ute and some long planks. Plumbing the water in – and then having a shower with excellent pressure – were the final, satisfying steps!